Sat - January 22, 2005
winter wonderland

Winter has finally arrived, with its own magic. We're making slow but steady progress on the interior of the house. So far the radiant floor heat has performed beautifully - with the thermometer below zero we're padding around in bare feet.
Talia visited during one our snow falls, without her boots. Grandma fashioned some plastic bags, which served the purpose quite well.

Yesterday we awoke to a spectacular sunrise over the eastern mountains - red sky above a white ground. In the distance those white outlines announce the village of Northfield, across the Connecticut River from us.

Mon - November 29, 2004
first holiday
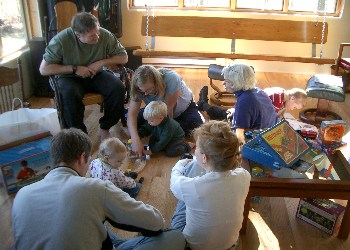
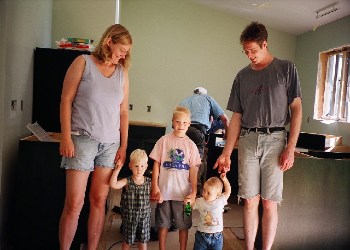
The kids and grandkids spent Thanksgiving 2004 at our new house.
back row: Bill, Jen, Max (in front of Jen), Jean (grandma), David (behind Jean).
front row: Jeff, Talia (in the middle of everything), Anita.
Grandma spends as much time as possible with the grandkids.
David likes to draw; Max and Talia are playing together.

Talia and Max got along well together,
despite the occasional turf battle over toys.

David also spent quite a bit of time on the computer.
Here he's showing Bill some of the finer points of this game.

On Friday we took a short hike up a local crag.
Talia negotiated the rocks pretty well,
and David stayed still long enough to catch him in this photo.

Grandma enjoying the mountain top with Max.

Sat - October 23, 2004
swingin pretty
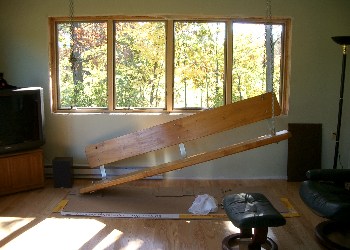
Fortunately we didn't have to have the swing hung in order to get the official certificate of occupancy - which we now have, so we're legal. But if you see Bill Becker tell him that he (er, we) made a miscalculation in the swing supports.
All is well now. But note the sloped ceiling, which could make for cockeyed swinging. If you want to see the cool mechanism for preventing this disfunction, you'll have to pay us a visit and inspect it in person. The guest suite awaits.

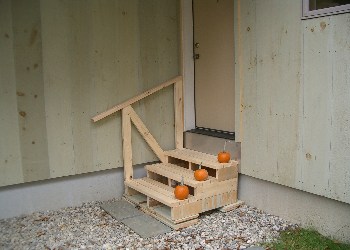
One of the things we needed to do to get the occupancy permit was to put up temporary steps, with railings, at each door. (Well, permanent steps would have sufficed as well.) Guess they didn't want us leaping those two feet indefinitely. Good thing, too, 'cause where else would we put the pumpkins. (Grandma is getting ready for halloween.)
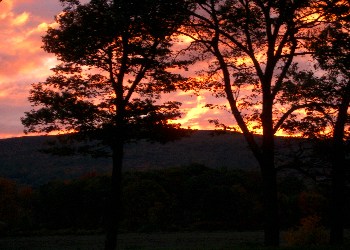
The fall colors have been great, and one evening the setting sun put on this fiery display over our mountain.
Thu - October 14, 2004
moved in

We're now moved in and enjoying this view from our living room. The colors are not quite at their height yet - maybe in about another week. Sorry for the long time between updates, but we've been pretty busy moving in and doing last minute things for the occupancy permit. To say nothing about being offline for a while (and still at low speed). And we're still busy - lots of finishing to do.
Anyway, here's what the kitchen looks like now, complete with Chambers stove and custom stainless steel sink/counter - dining table in the foreground.
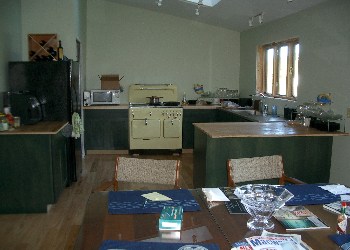
Here's a close-up of Jean's domain, and a somewhat better view of the sink. Jean is enjoying the kitchen tremendously, as well as the open design of the great room (kitchen/dining area/living room combo).

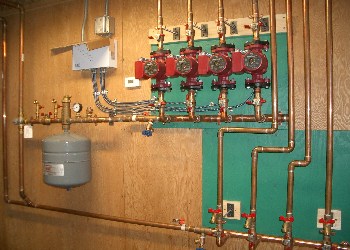
Jerry' domain is the basement. Here's the array of zone pumps for the radiant floor heating. He keeps "checking the temps" and fiddling with the controls to get the (elusive) optimum effect.
Wed - September 22, 2004
break time

Well, no, this is not the view from our deck. We took a week's break from building and went to the Canadian Rockies with Jeff, Anita, and Talia. Generally the plan was for us to babysit Talia while Jeff and Anita did some hiking, etc. The weather didn't totally cooperate, as this photo is typical of the mountain clouds we experienced.
Jean with Talia at the cabin. This was Talia's first tricycle ride.

Jerry with Talia at Lake Louise. We did get in some modest hiking.

Talia, Jeff, and Anita on the suspension bridge over the Maligne River. Everybody enjoyed the change of pace, but now we're all back in harness.

Sun - September 5, 2004
kin and kitchen
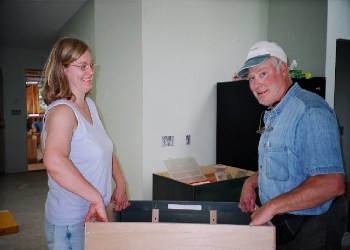
The line-up: Jen, Max, David, Talia, Jeff. Jerry and brother Tom are in the background fooling with kitchen cabinets. That's Tom with his back to the camera; jerry is behind Tom.
Jen and Tom with a cabinet. All cabinets and the new one-piece stainless-steel sink/counter (photo in a later entry) are now installed.
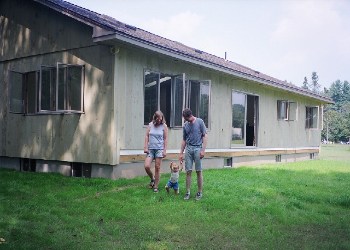
Talia waving bye-bye, flanked by Jen and Jeff. That new grass has now been cut for the first time.
Wed - August 18, 2004
green grass
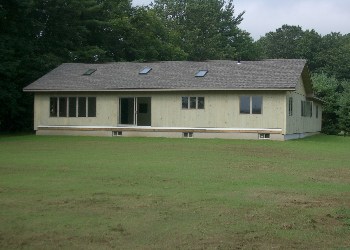
The grass is now green over the septic tank (and the yard all graded and planted).
Here the bulldozer puts the finishing touches on the grading near the house.

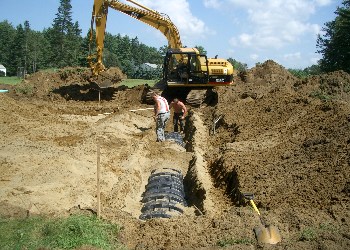
Before final grading the septic field is installed - 75' of infiltrator units.
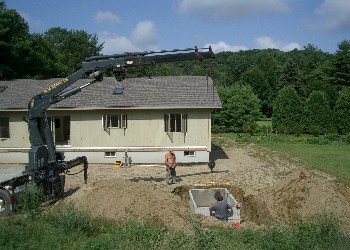
And before the septic field, the septic tank is installed. The guy without the shirt has a remote-control unit that controls the crane dropping the septic tank into place - it's amazing the exquisite control delivered by this system. The operator said it's technology, working its way into the private sector, originally designed by the military to load missiles into planes. (Our tax dollars at work.)
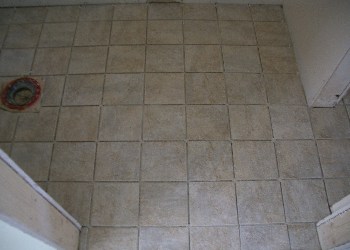
Inside finishing has begun - witness the tile job in the half bath. Can a toilet be far behind?
Fri - July 30, 2004
drywall hung
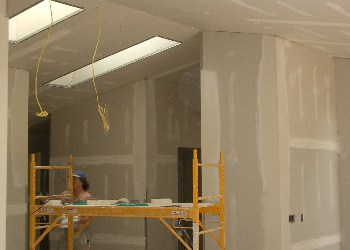
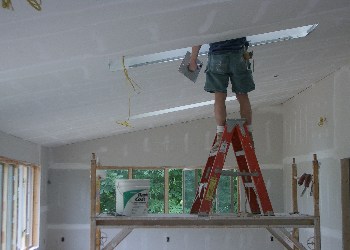
The drywall is hung and is being finished. When this is done we have a whole bunch of painting facing us - surely y'all will want to come help with that.
This is no simple drywall job. Here one of the skylight wells swallows half of the finisher. The drywall steps are: first all the boards have to be hung, then three coats of finishing compound are put over the seams and corners, then it's all sanded smooth, and then primed for painting. Quite a job, which Jean mostly did herself in the house we built 33 years ago in upstate NY. (But that's not Jean halfway into the skylight - it'd be hard to get her to stand on a ladder like that.)
The septic tank has also now been installed - pretty slick how they use a remote-controlled crane to drop it right into place (that guy standing near one corner is operating the remote control unit, which he says was originally developed by the military to load missiles into planes.) With a septic tank installed can an operable toilet be far behind?

Sun - July 18, 2004
inspection time
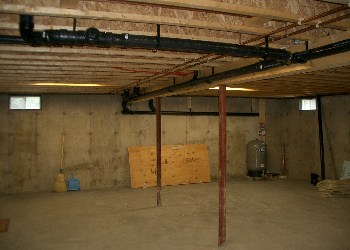
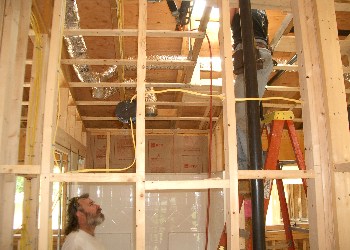
Both the (rough) wiring and (rough) plumbing have now been successfully inspected, paving the way for the framing inspection. After that comes insulation installation and the the drywall. Note the water tank in the corner, now connected to the well.
Here Neal, the framing contractor, hands a final board up to Tom for completing the master bathroom skylight framing. The newly-installed shower is in the background, and above is the ductwork for the shower fan.
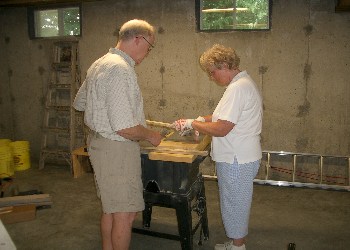
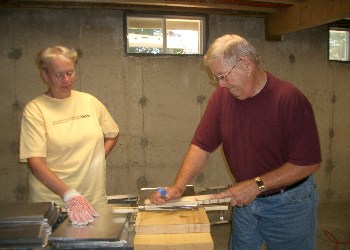
Bill showing Carol how to run the bracket-forming mechanism for making the aluminum plates for the radiant heat tubes. Bill and Carol Becker are friends from Ohio; Bill stayed with us for a week while Carol attended a music conference - in his spare time Bill turned out a bunch of plates.
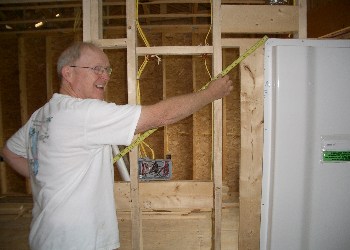
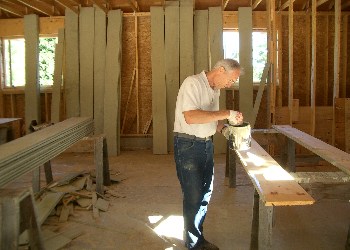
When not forming aluminum plates, Bill assisted with various other odd jobs. Here he's making sure that the (horizontal) distance between the shower stall and the switch box is correct by mentally taking the square root of the difference between the square of the hypotenuse and the square of the height the shower is above the switch.
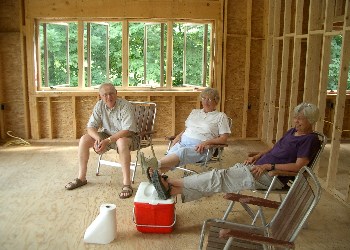
Here's the hard-working crew - Bill, Carol, and Jean - hard at work figuring out what to get out of next.
Wed - July 7, 2004
walls & windows
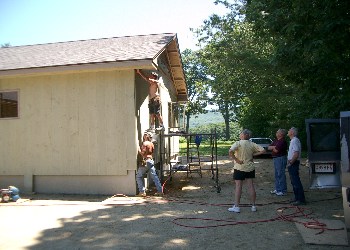
The windows have arrived and are installed - see the edge of the bedroom window on the left and an open casement living room window behind the workers. The gawkers, left to right, are Karen Miller, Don Miller, and Jerry - the Millers are visiting from Ohio, and we didn't let them gawk long before pressing them into service. The workers, Tom (low) and Jim (high), from the local framing crew, are installing the vertical siding. You can barely make out the vertical pattern and the pine knots showing through the semi-transparent stain.
Don's and Karen's main assignment was pressing out those aluminum plates for connecting the radiant heat tubes to the floor (see the previous entry). They got pretty good at this, but didn't finish, so it looks like we'll have to have them out again - can't let that newly gained expertise languish.
All those siding boards have to be prestained front and back. Here Jerry is bent over that task. Don and Karen helped sort the finished product into various quality stacks, such as those leaning against that back wall.
Fri - June 25, 2004
radiant heat

The radiant floor heating tubes are now strung. Enough aluminum plates are installed to hold the tubing in place, but ultimately aluminum plates will cover all of the tubing (and straighten the runs out in the process). The aluminum will facilitate the distribution of the heat from the hot water in the tubes to underside of the floor.
The work crew, left to right, comprises Jerry, Bill, Jeff, and Talia. Since this was the first time that Jeff (Talia's dad), Bill (David's and Max's dad) or grandpa Jerry had done a radiant floor, Talia is showing them the finer points of the craft.

Bill and Jeff straightening and positioning about a 10-foot section of the almost half a mile of tubing they installed over a two-day period.

Jerry trying to figure out where that where that next loop goes.
Well, after getting the guys straight on the radiant tubing, Talia needs to inspect the quality of the carpentry.
Fri - June 18, 2004
let there be light

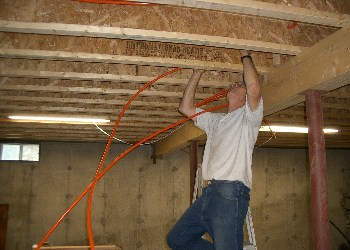
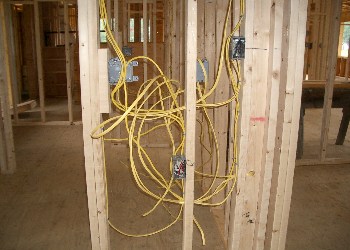
The electrical stuff is now mostly roughed in. That box on the left is a switched outlet, the next one is for the TV cable, and that loop rolling out on the floor will ultimately connect to a (backup) baseboard heater.
Now don't you think they could have done a bit more orderly job with the bathroom wiring??
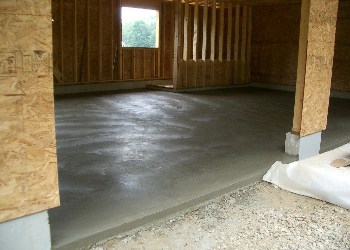
Today was a banner day as we also got the garage floor poured (can't walk on it until tomorrow), which not only paves the garage but also the way for the remaining earthwork - septic system, driveway, and landscaping around the house. In the back of the garage you can see the stairwell to the basement - we opted for an in-garage stairwell rather than an exterior "bulkhead" entry (bulkhead is the local term for those exterior short/steep basement entries covered with sloping steel doors).
Fri - June 11, 2004
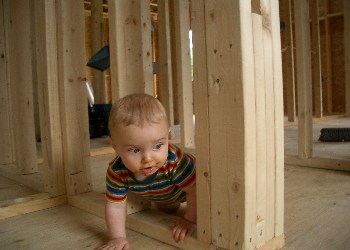
interior walls

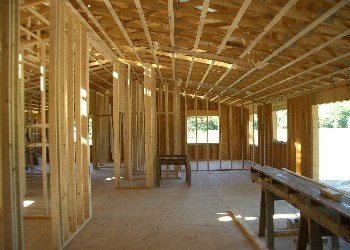
Well, guess you wouldn't say the interior walls are in, but the studs are. Ready now for the rough plumbing and wiring, scheduled for next week. Then the drywall goes on and we'll really have interior walls. This view is looking from the den/bedroom south into the kitchen/dining/living room. That's the kitchen window, above the sink, on the left, followed by the sliding glass door onto the future deck, then the living room windows on the east and south walls.
This is looking the other way, from the living room to the den/bedroom. On the far right is the sliding glass door, then the kitchen window, then the east and north den windows. Barely discernible on the left is the master bedroom door and, more apparent, the opening into the entry and bedroom halls. Those slats along the ceiling are to carry the ceiling drywall.
Max helping grandma negotiate that narrow space between the ramp and the garage. Right behind them is the front door; peeking out is the skylight in the entry hall. That other skylight is above the toilet in the master bath; we changed the orientation of that fixture so that you can see out that window while sitting and contemplating ...

Thu - June 3, 2004
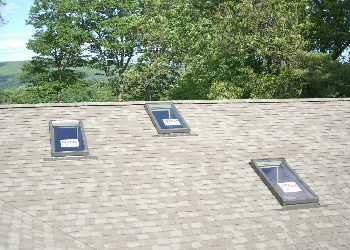
Roof Completed
"Weathered Wood" is the poetic name for the color of
the shingles. These three skylights are in the "great room": the near one in the
kitchen, the next one over the table, and the far one in the living
area.

Three more skylights, on the other side of the house: the left one is in the entry hall, the next one lights up the circular stairs, and the one on the right is in the master bath. There are 10 skylights in all, seven in the house (not shown is the one in the guest bath) and - can you believe it? - three in the garage (south facing, of course).
Mysterious interference pattern in this photo showing the three skylights in the garage, as well as the entry/stairs/bath cluster. (This photo taken standing on terra firma . Don't tell Jean that Jerry went up on the roof to get the above two shots.) An angry sky in this one; soon after this picture was taken a thunderstorm slammed in - no apparent skylight leaks.
Fri - May 21, 2004
Dried In

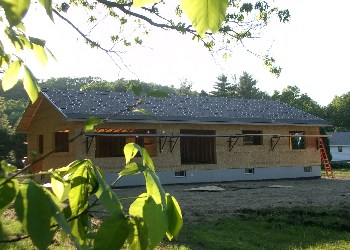
The roof deck is on and covered with tar paper, the layer that goes under the shingles. The tar paper sheds the rain, so that means that the inside will be dry, no matter the weather. Well, presumably a driving rain could still go in the window/door openings, since there are no windows and doors installed at the moment, but still we're "dried in".
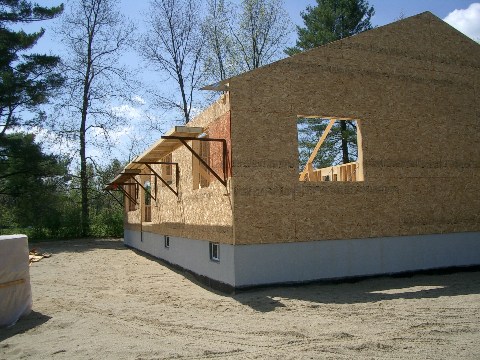
The above photo shows the garage end of the house (those are garage-door openings, right?). The front door is that hard-to-see opening on the right of the above picture. Below shows the house to the right of the front door; this photo is in the direction of the mountain view, obscured here by the house.

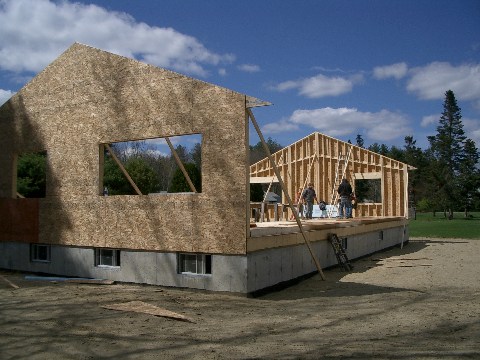
Now looking the other way (the mountain view is behind, the shot is into the sun) the living portion of the house is more apparent. That big window on the left is the living room, the next opening is for a sliding glass door (onto the future deck) in the dining area. Then the window above the kitchen sink, and the far right window is the bedroom/den. The shingles should go on next week, weather permitting, and the the roof will then be complete.
Thu - May 13, 2004
Trusses Up

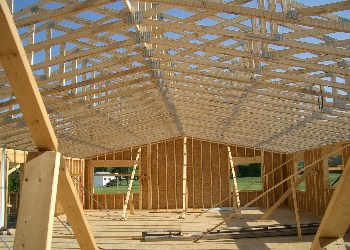
Well, the trusses are up and ready for the roof decking.
With the crane and a good crew it took only three hours to install all the trusses.

The inside - after trusses, before roof.
A six-foot overhang protects the garage doors and front porch.
Fri - May 7, 2004
Truss Ready

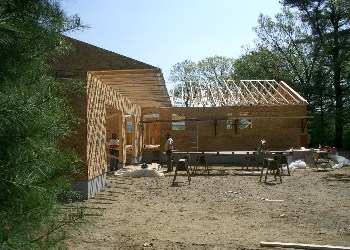
All the walls are now up and braced, for both the house and the (attached) garage. This view shows the two 10-foot-wide garage doors (think we'll be able to hit those when the snow flies and it's icy under wheel?). That's the front door in the corner - both it and the garage doors will be under a six-foot overhang (stay tuned). The roof trusses, which are next to be erected, are in the foreground, garage trusses on the left, house trusses on the right.
The scaffolding is ready for installing the trusses. There's a similar scaffold on the other side. A crane will lower each truss into place, and a person on the scaffold will fasten them to the top of the wall.
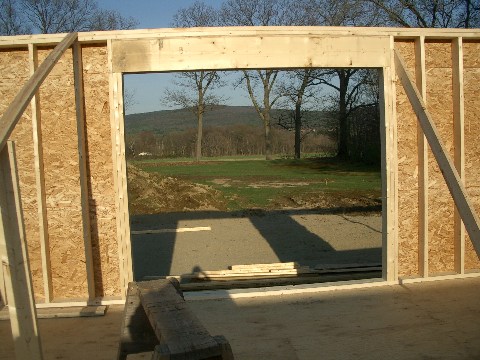
Looking out the eight-foot sliding glass door on the back (east side) of the house. Ultimately this door will lead onto a deck along the back.
Wed - April 28, 2004
walls arisin'
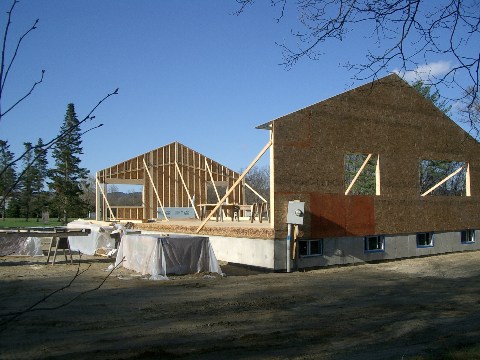
The two endwalls are now erected. They are the toughest, as they each incorporate an end truss. These are scissors trusses, which means they are not flat on the bottom but angle up in the center to form a sort of minor cathedral effect. That large window in the foreground is the south window in the living room.
Sort of the opposite view shows pretty much the same thing, with a garage foundation lead-in. That large window on the left of the right-most wall is the south window of the living room. That smaller window to the right is in the master bedroom.

Back again the other way. That fairly large window on the left is in the guest bedroom, and as you can see the guest bedroom looks out at some verdant hills - well, they are verdant is some seasons - and of course a brilliant blue sky.
Wed - April 21, 2004
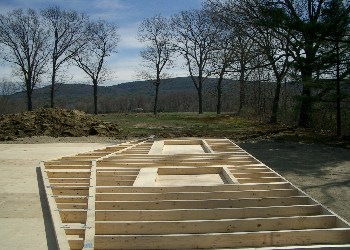
deck completed
The deck (plywood subfloor) is now installed, and that's the south wall assembled and laying on the deck (almost) ready to be erected. Below is another view of the south wall, showing the the framing for the bedroom and living room windows. This is also a good shot of the scissors truss, making the ceiling 39" higher in the center of the house than on the sides, giving a partial cathedral effect.
Below are before/after shots from the basement - before the deck and lolly columns (round metal posts) installed, and after (who turned out the lights?).
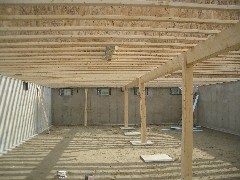
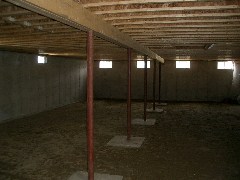
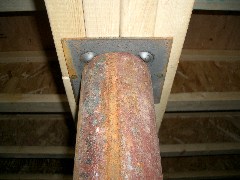
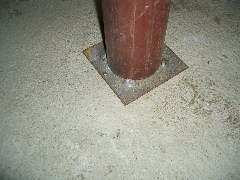
And since Jeff asked, here's how the lolly columns interface with the center beam (left) and their concrete footings (right). The bottoms of these posts (picture on the right) will be encased by the concrete floor when it is poured.
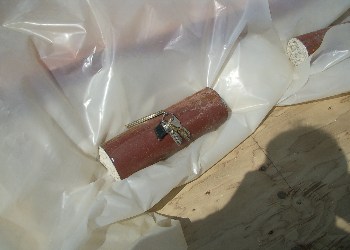
Finally, note below that each lolly column had to be shortened by about a foot from its stock length - this is a view of such a cut-off end, which shows the concrete filler in the post (a technique invented by Mr. Lolly).
Fri - April 16, 2004
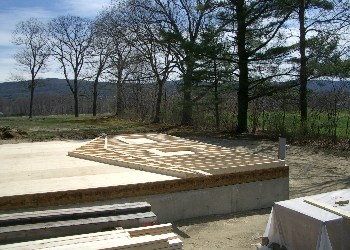
framing started
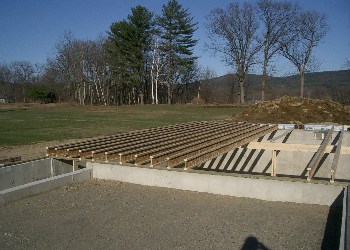
The sills are in (that greenish-looking wood on top of the foundation), the center beam is in, and the those I-joists are started. A close-up of the I joists (below) shows the structure mentioned in the last entry - namely 2x3's top and bottom with a web of plywood (actually a variation called OSB).

After the I-joists are all installed, the plywood subfloor decking goes on. That bundle of plywood below on the right is the tongue-and-groove subfloor decking. Then the walls are built; that orange stack left of center is the exterior wall sheathing (which is OSB).
So much for this week (it's Friday) - will continue next week.
Thu - April 15, 2004
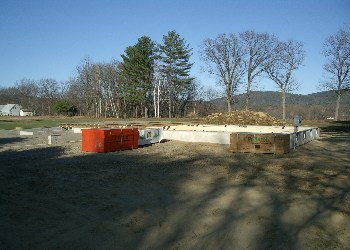
first delivery
After another couple of days of rain the skies have cleared and we're getting started on the framing. This is the first delivery of framing materials. Those long things are the 32-foot-long floor joists - manufactured "I-joists", wooden I-beams with 2x3 top and bottom rails and an OSB (plywood) web. The I-joists will span the entire 32-foot width of the house, but will be supported by a beam in the center.
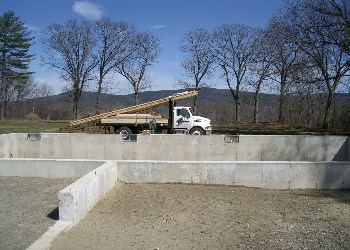
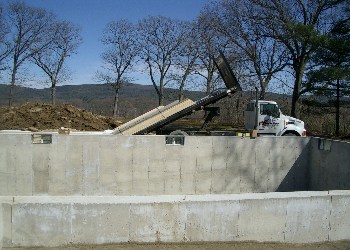
All these bundles are banded, loaded at the lumber yard by forklift. To unload on-site they simply tilt the bed of the truck and drive off, leaving the stuff to drop to the ground. One bundle of I-joists actually rolled off the side; the other got hung up and the driver had a tough time dislodging it. Makes one sort of cringe to see all that expensive wood manhandled so brutally, but apparently no real harm is done (most of the time). One I-joist did break - snapped right in two; the driver said "we owe you one - no problem, we have them in stock".
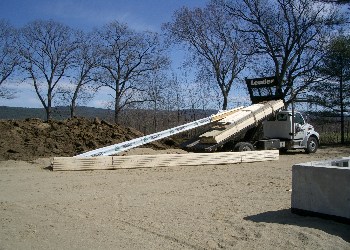
Below is the rest of the load sliding off. This comprises the lumber for the center beam (supporting the middle of the I-joists), the sill (the layer of wood between the concrete foundation and the I-joists), and the end caps (the wood pieces capping the ends of the I-joists). After all this is installed comes the plywood decking, which is supposed to be delivered tomorrow. Then come the walls, roof trusses, and roof. Stay tuned ...
Fri - April 9, 2004
sump installation
David helping grandpa install the form for the basement sump - the sump is the hole in the basement floor that catches any water that might be spilled.
Well, maybe that wasn't so interesting a project after all.
Of course, ya gotta have proper supervision.

Tue - April 6, 2004
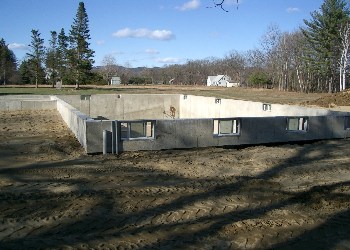
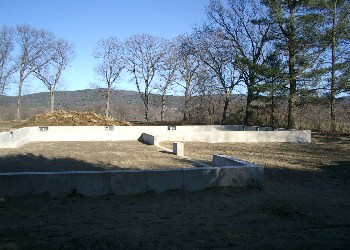
underground utilities

The foundation has been inspected and backfilled. Today the conduit for the underground utilities (electric, phone, cable) was installed - trench dug, conduit laid, trench backfilled. Note below the three conduit pipes sticking up next to the foundation. Ready now for wires to be pulled and temporary electric service for power tools - hopefully the sawdust will soon fly.
Today was a beautiful day - that rainy spell is long gone. Here's what our early-April view looks like on a blue-sky day.
Wed - March 31, 2004
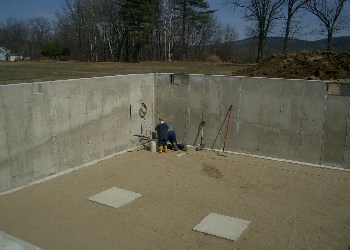
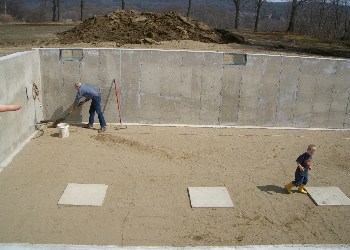
foundation poured
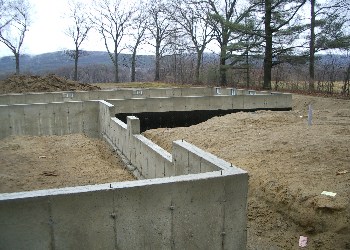
Well, we got started the last week in March, with the poured concrete foundation. The lot is one big sand pile, under a foot of loam - so drainage is great. This photo was taken after and during a real downpour, and not a bit of water is evident in the hole. That's the (attached) garage in the foreground; the house looks out at the Northfield Mountain across the Connecticut River valley.
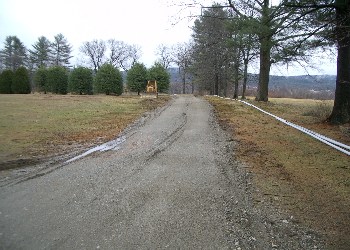
We'll have a 200-foot driveway beginnings of which look like this (below). The house - that is, the foundation for now - is behind that row of evergreens.
Quick Links
Calendar
| Sun | Mon | Tue | Wed | Thu | Fri | Sat |
Categories
Archives
XML/RSS Feed
Statistics
Total entries in this blog:
Total entries in this category:
Published On: Jan 22, 2005 03:38 PM
Total entries in this category:
Published On: Jan 22, 2005 03:38 PM